
How to Keep Track of Your Fibres
Background
One of the challenging of being a fibre artist is keeping track of all of the experiments and processes, so that you can learn from what you do.
It’s perhaps the area in which I have the most room for growth. I’m usually too excited by the process to make all of the notes I would like to have later. But I’m learning and I’m developing resources and processes as I go.
The practices on this page will give you a headstart!
Keep a Fibre Log
Label, Label, Label
Develop a Shorthand (and a Log) for Your Processes
Enjoy the Journey!
completed fibre log
my hand drawn version
‘original’ fibre labeled with my Item Number
One: Keep a Fibre Log
“ProTip: Fill in your fibre log as soon as you get home, while the information about where you got it from (and why) is freshest!”
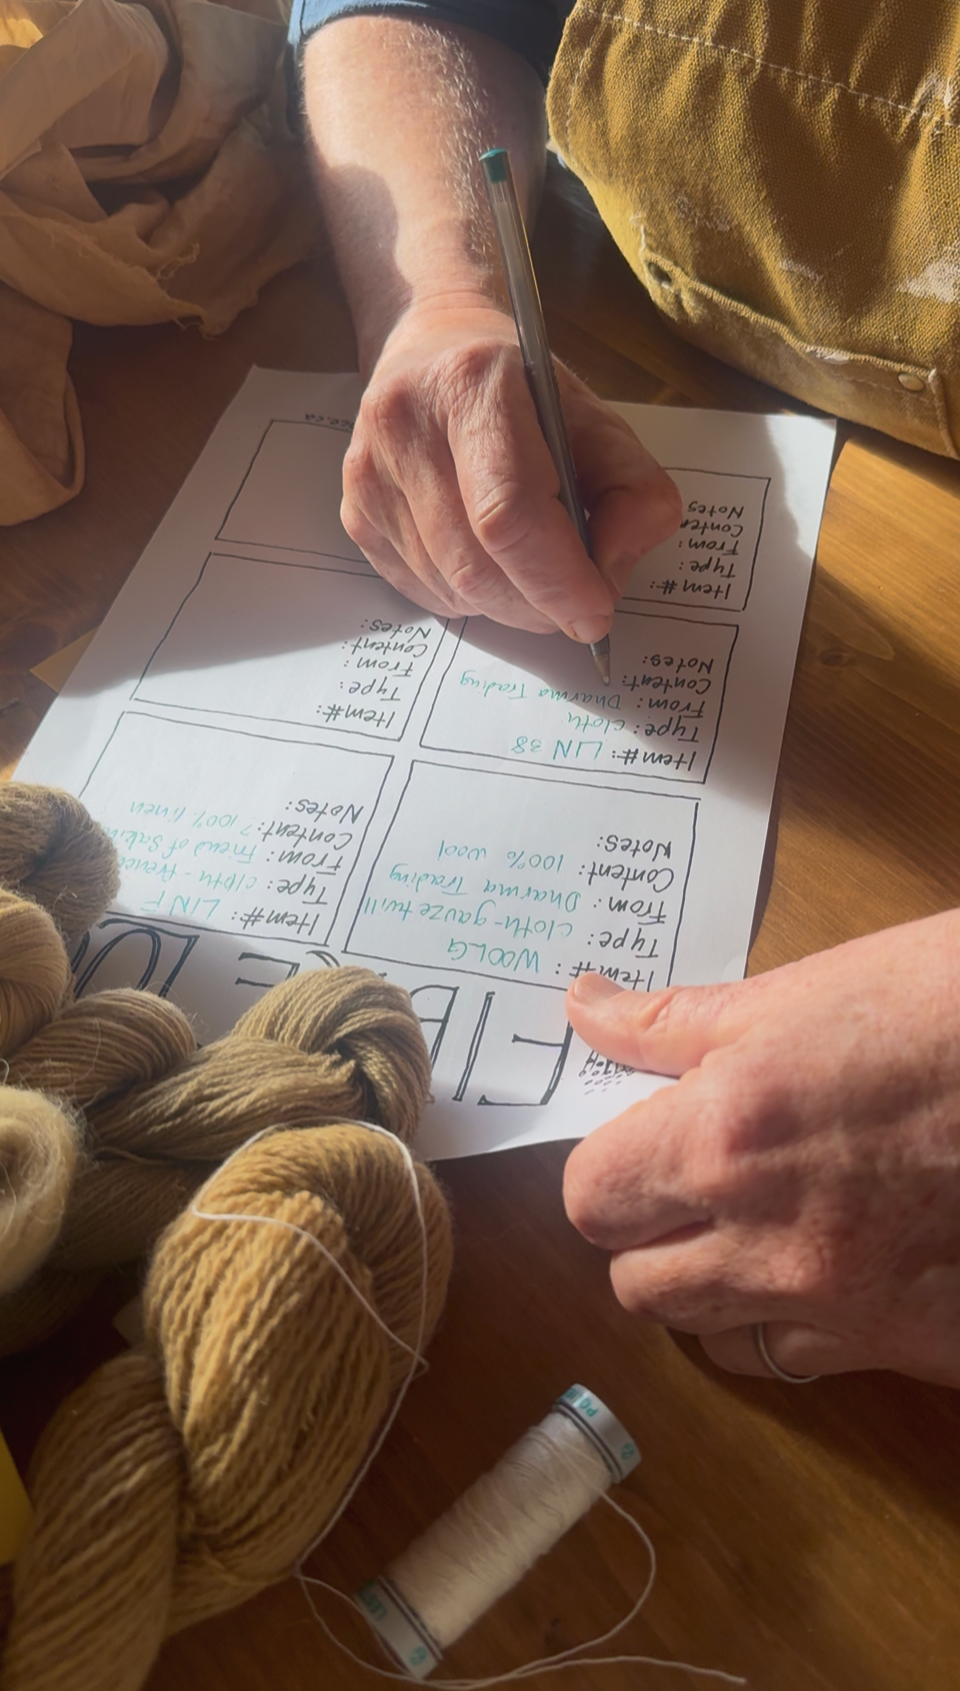
When I start working with a fibre for the first time, I pull out my fibre log and enter the pertinent details.
My fibre log is originally a hand-drawn document that I have turned into a pdf so that I can print copies of it to fill out. You are welcome to use mine. Or you can create your own journal, spreadsheet, or system. Whatever works for you!
Here are the steps I recommend you take:
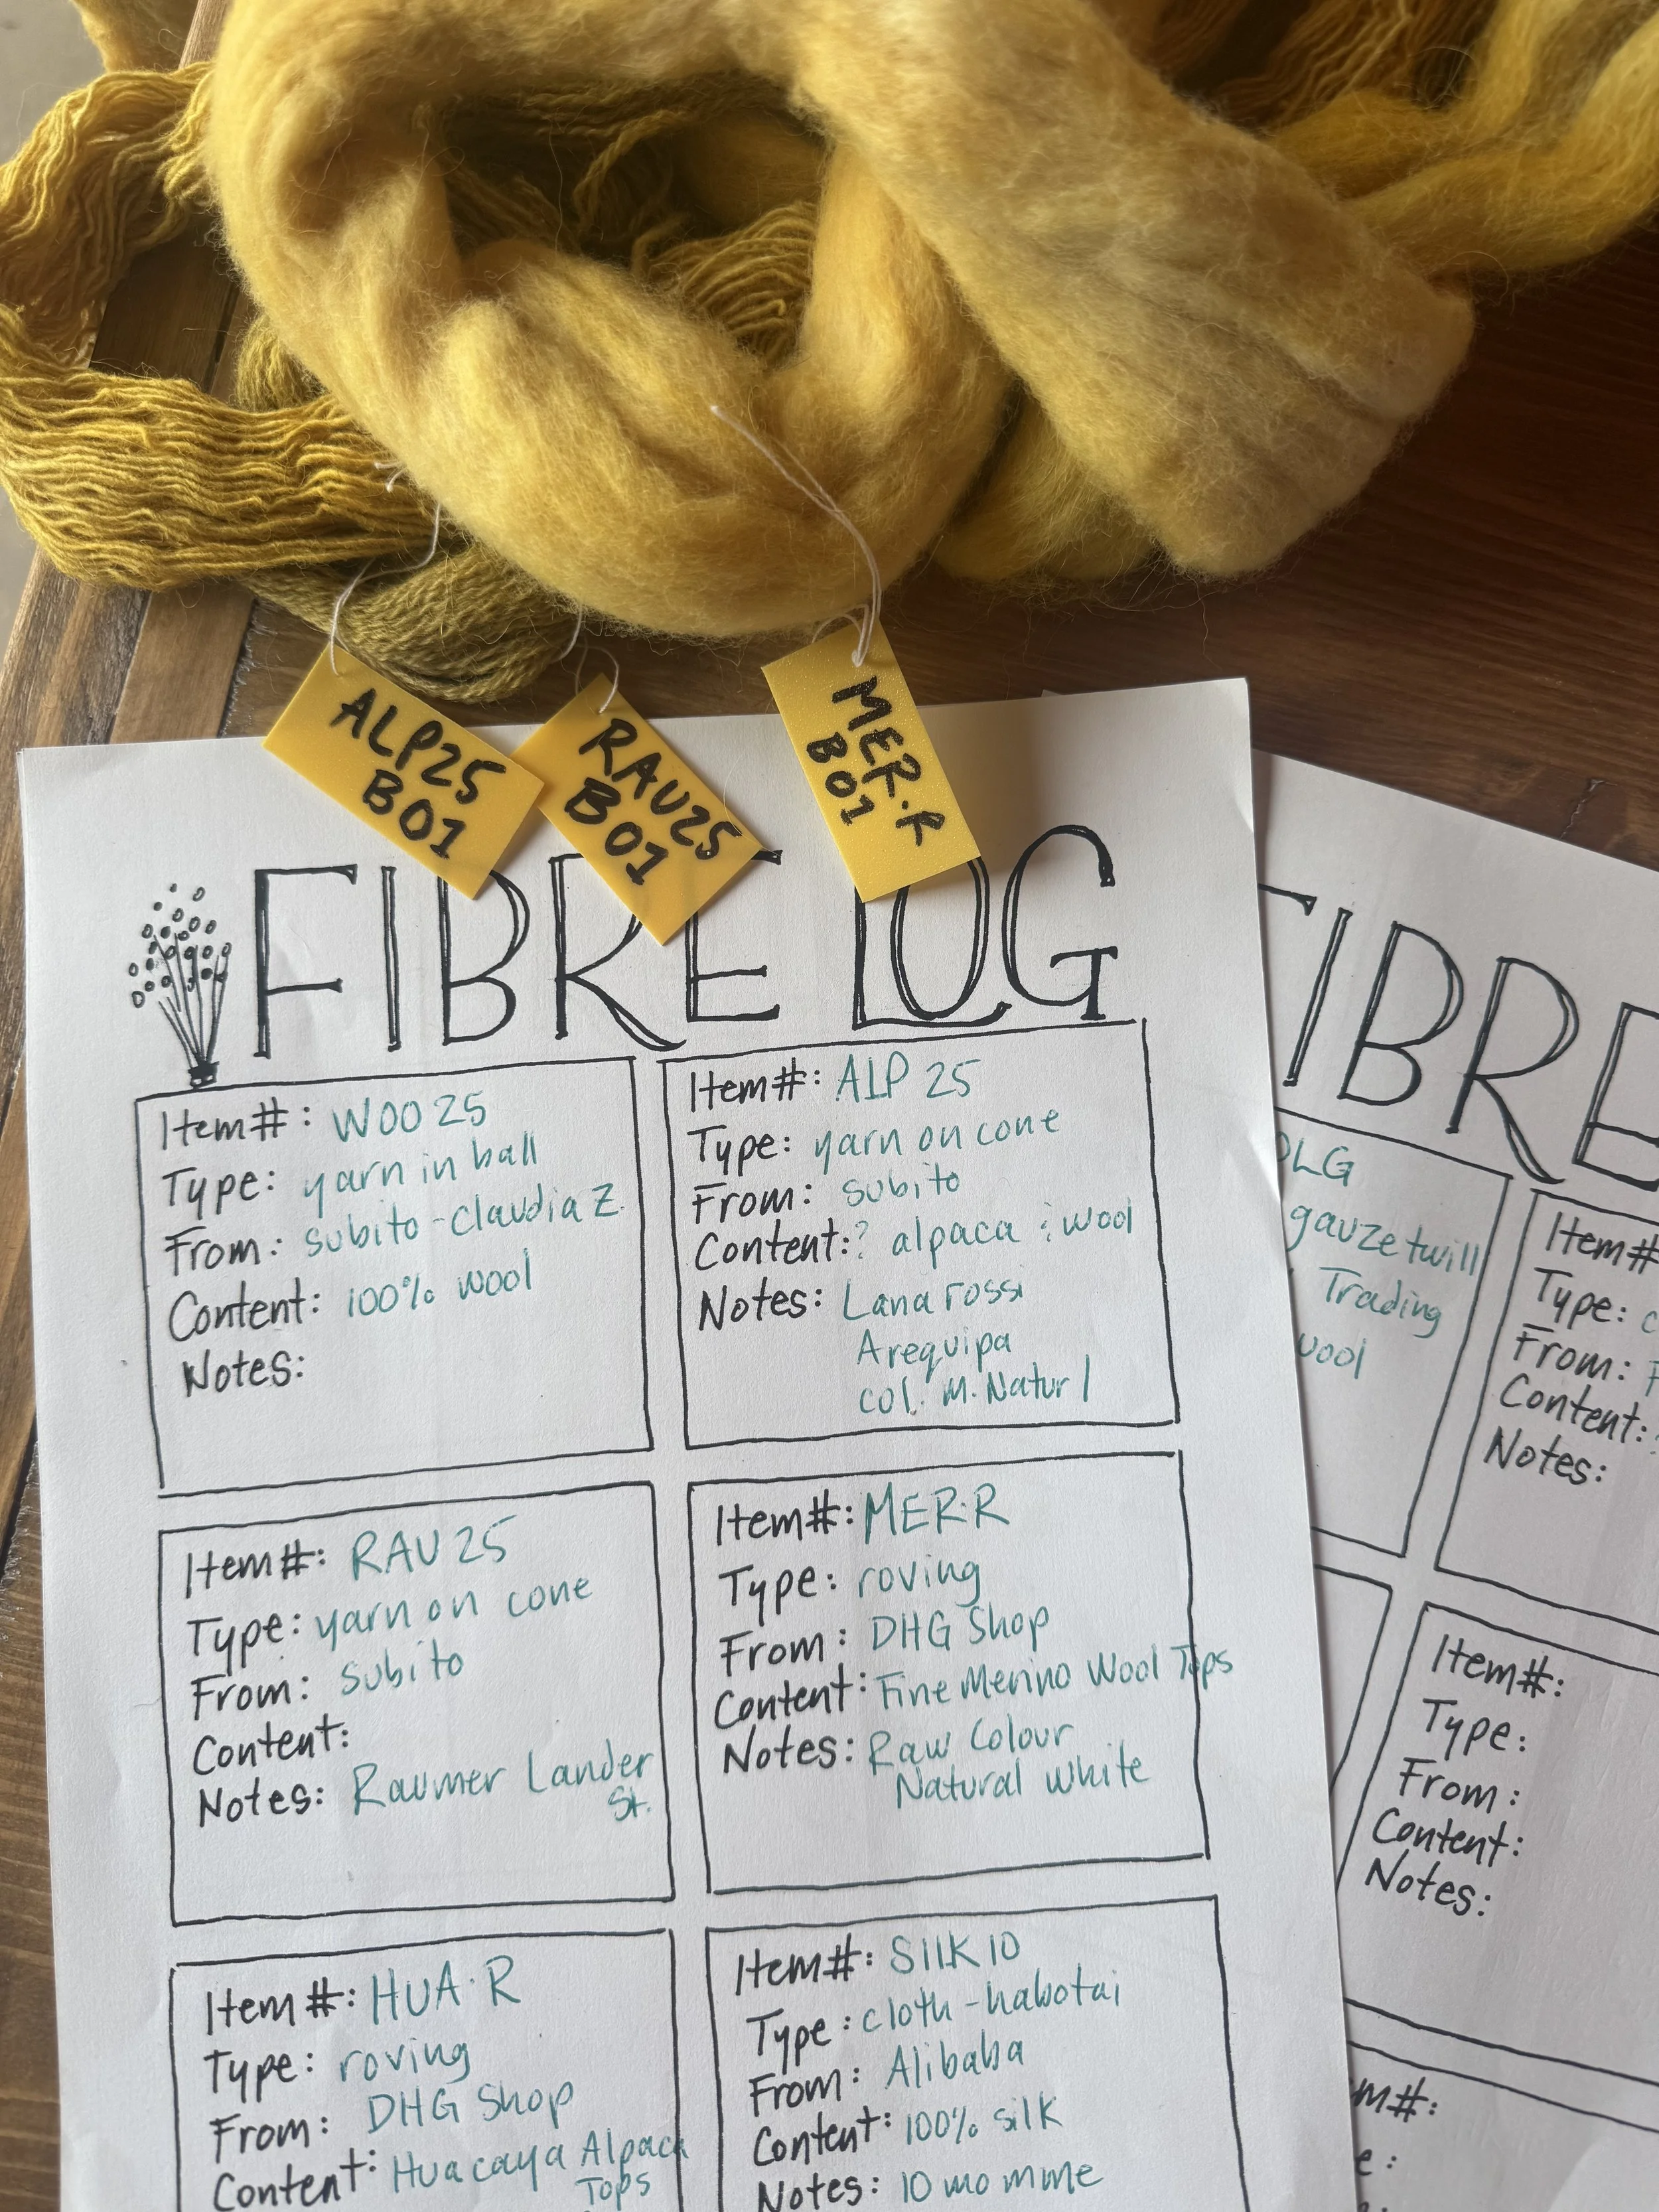
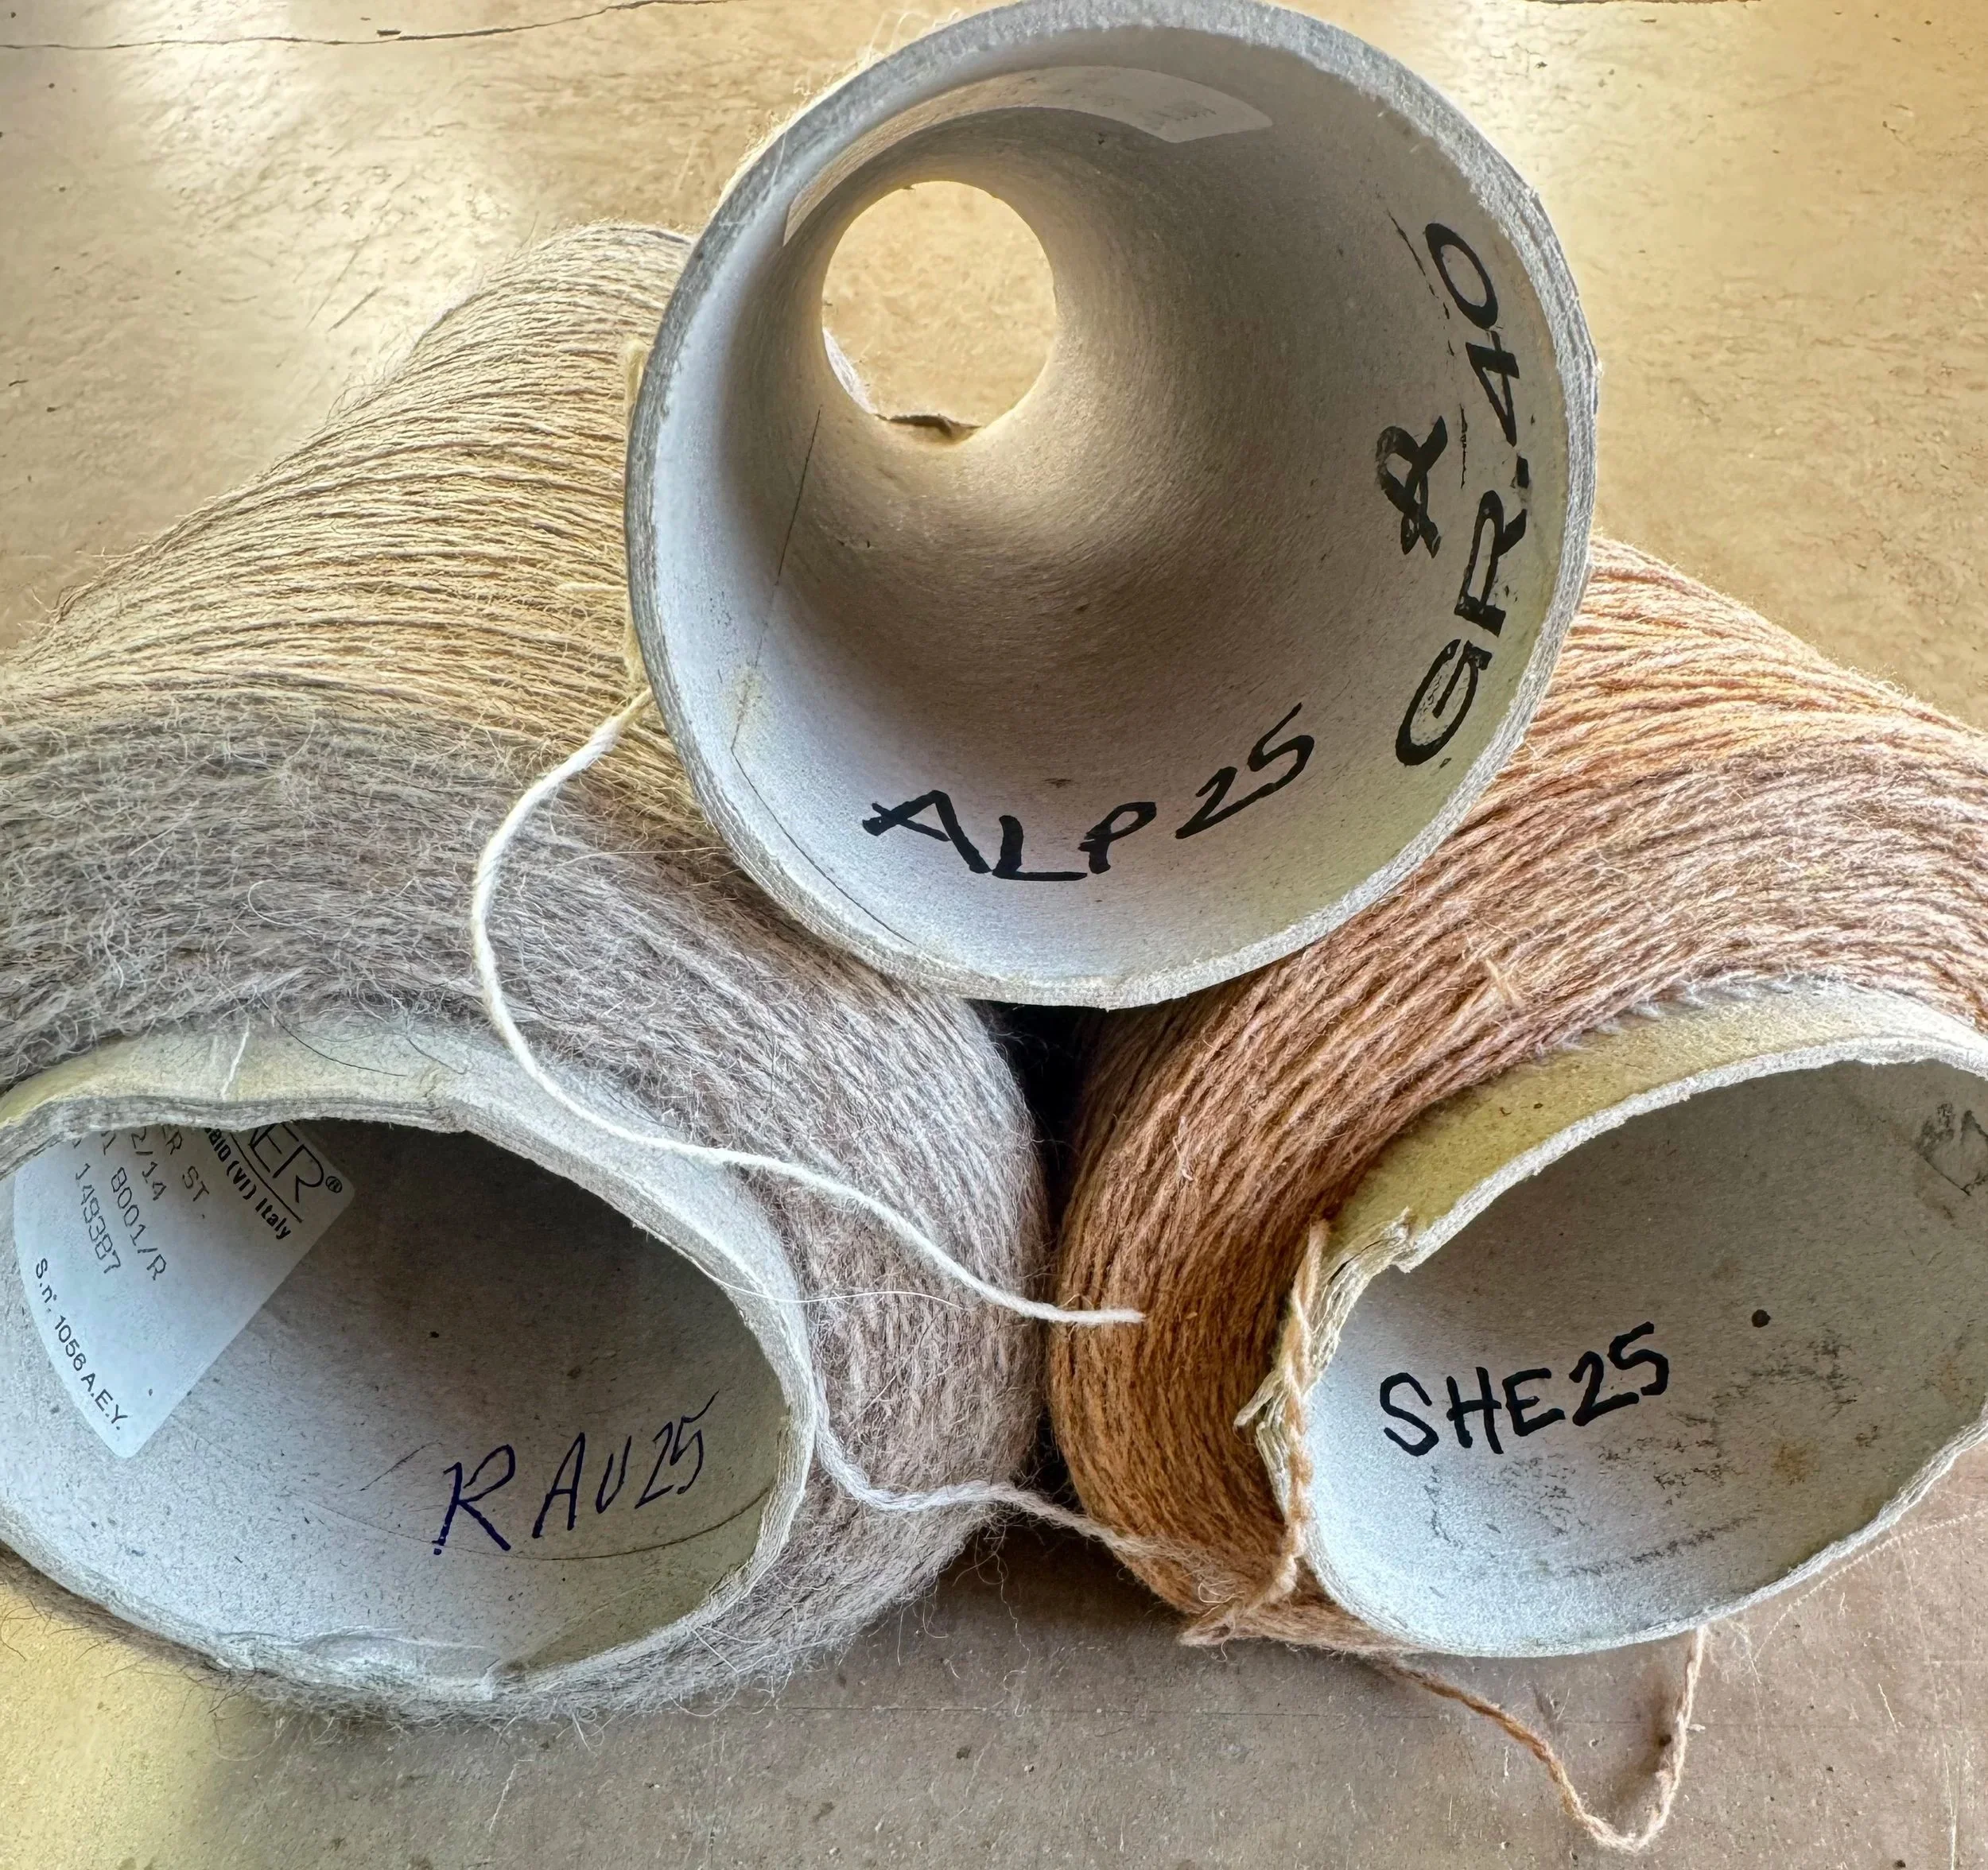
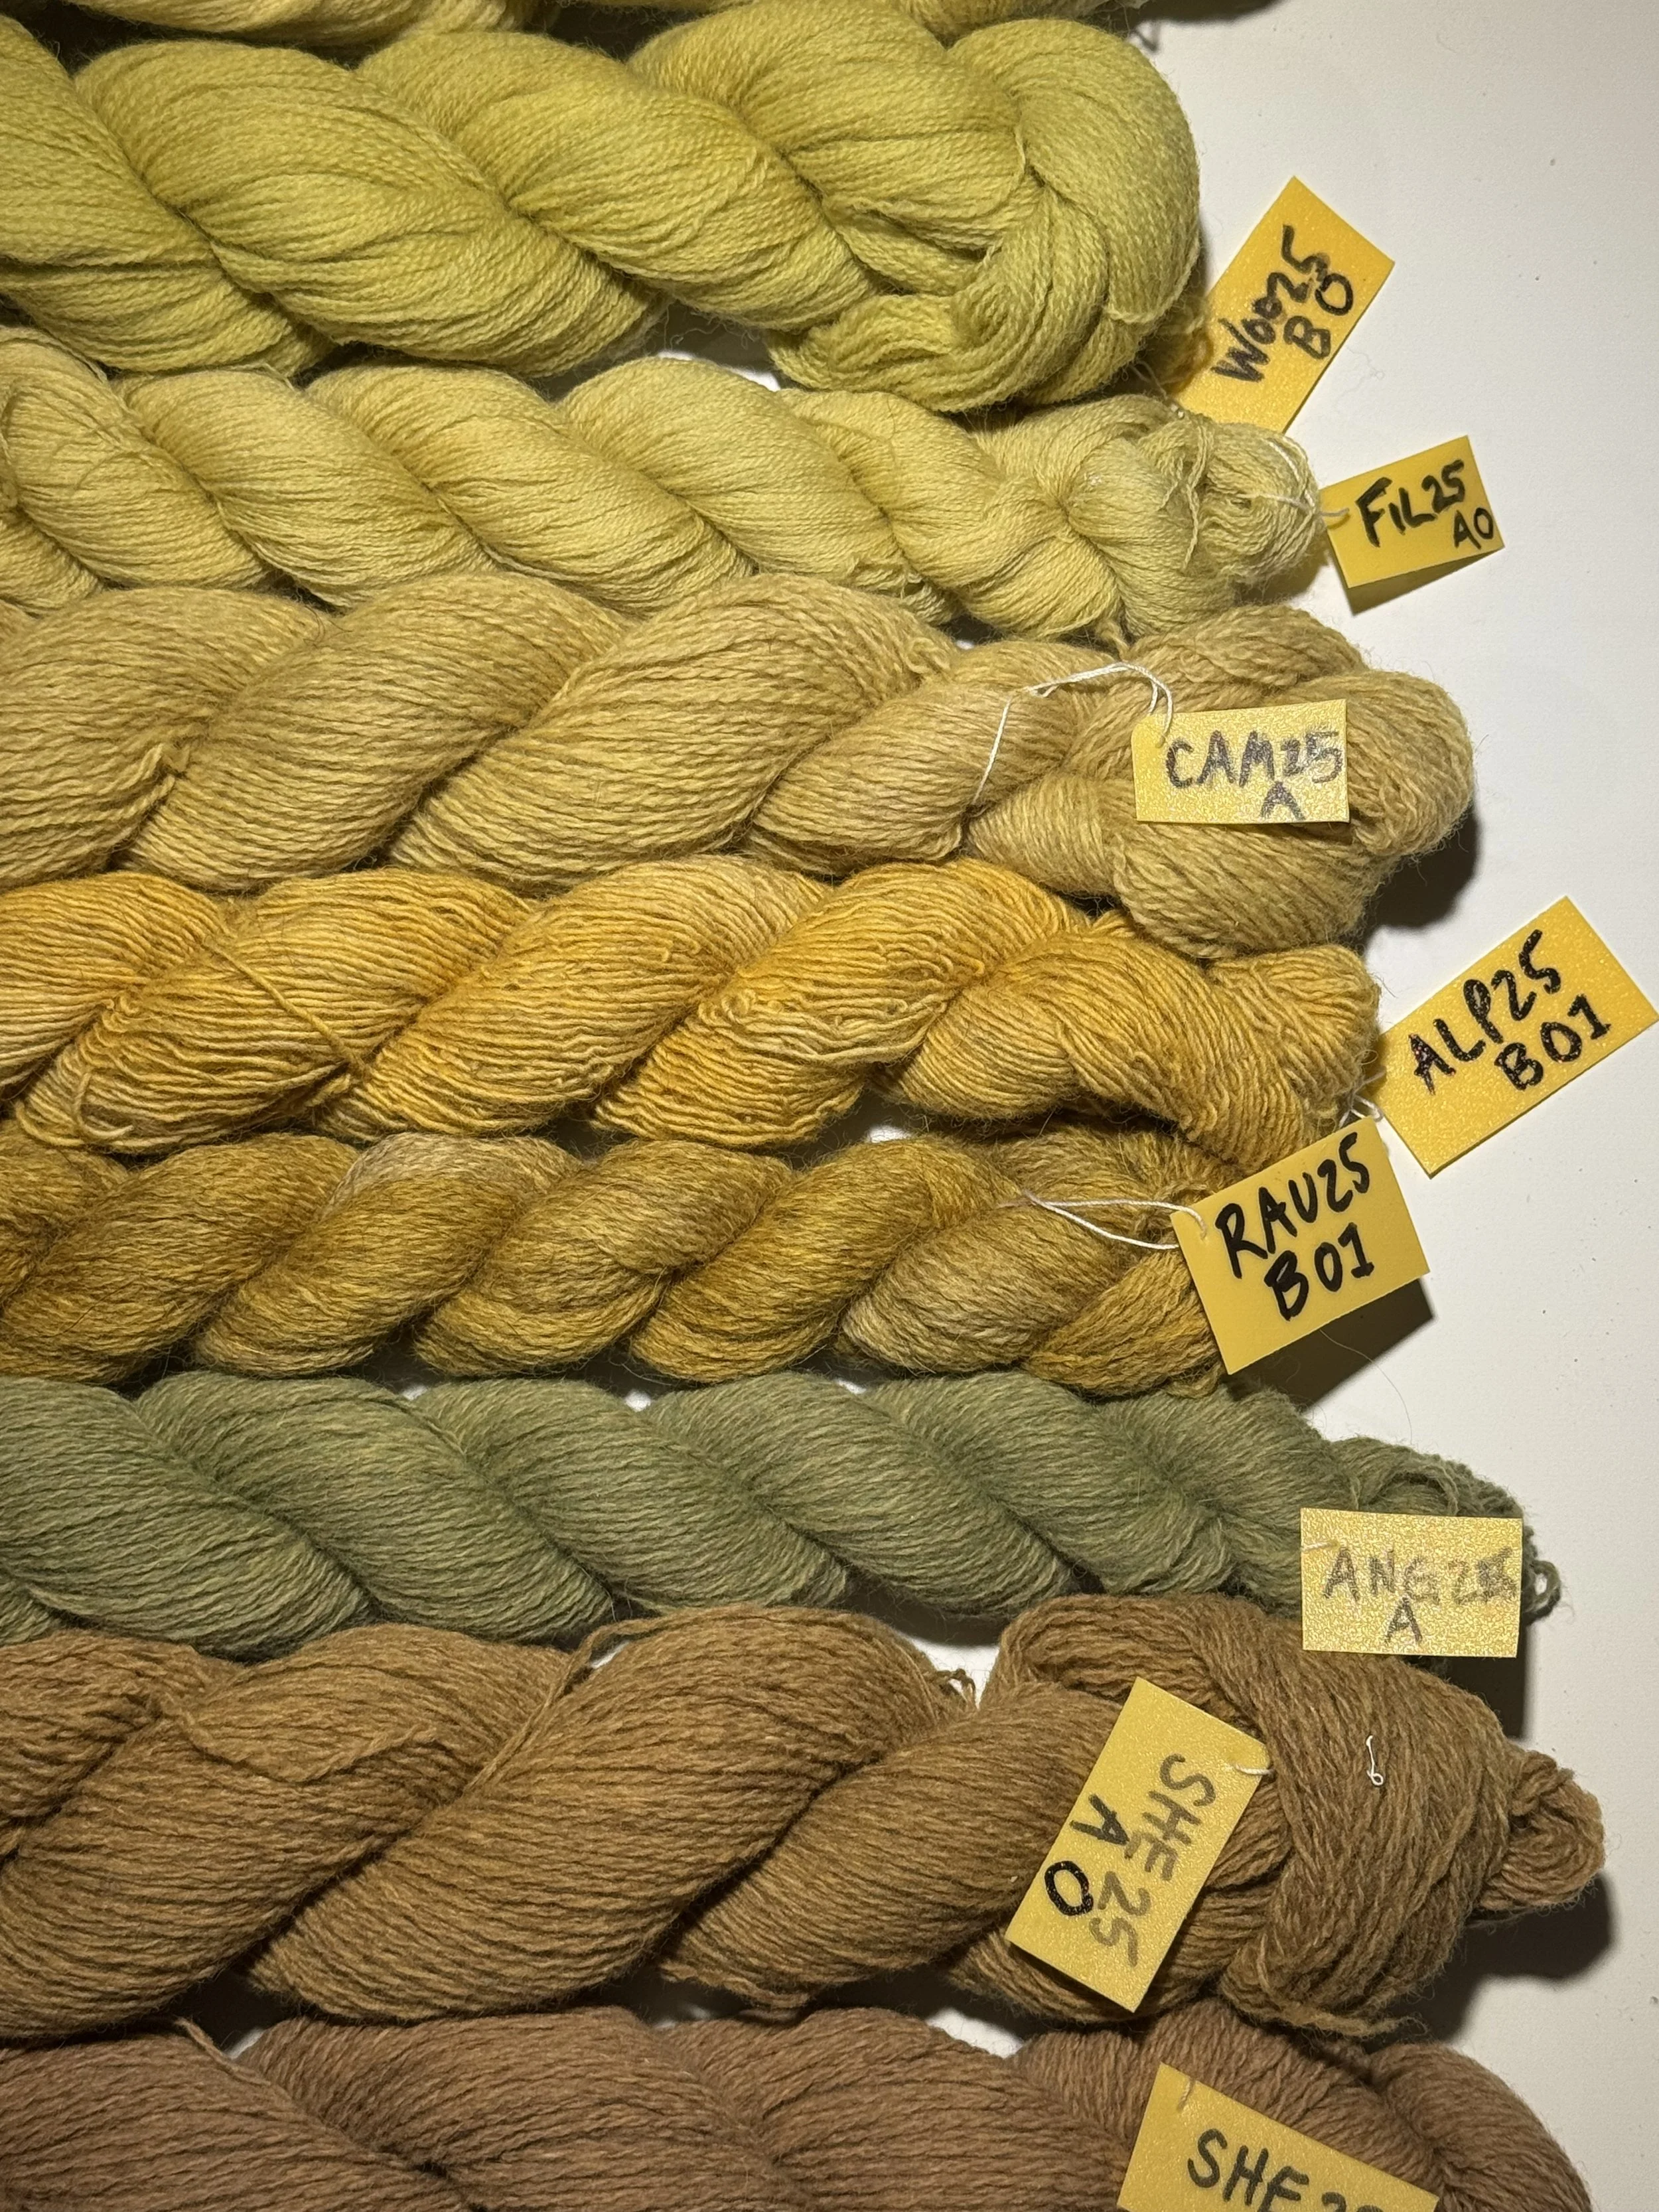
Give each fibre an Item Number (or Identifier) - Choose a ‘number’ that is short and yet relevant (note it isn’t just numerical). You will write this number on each tag that you attach to fibre, so make it memorable. Choosing something that is memorable or relevant means that later, when you’re trying to identify the fibre, the tag with the Item Number will give you a clue. For example, SILK25 is the item number for a skein of silk that I purchased in 2025. WOOLR is the item number for my wool roving.
Describe the fibre Type - Some types include: yarn on cone, yarn in ball, sliver, roving, cloth. Often this helps me remember where this fibre is stored, or what to look for among my samples.
Indicate where you got the fibre From - This could be the name of a store, a person, or a place. For example, I purchase lots of my fibre second hand from an online marketplace. So for those purchases, I write the name of the marketplace and then the name of the person from whom I purchased it. If I purchase it from a store, I will try to include their identifier code so I can purchase the exact same thing again. And if I’ve gathered it from somewhere, I indicate where.
Provide the best information you have on the fibre Content - Recently purchased fibre often clearly lists the contents. Second hand fibre often doesn’t list the information, but a little sleuthing on the internet can provide some details. To help me later remember if the information is known or not, I add question marks. If I’ve looked it up, one question mark means it is highly likely, two means I’m making an informed and educated guess, three means I am making lots of assumptions.
Make any Notes that you think would be relevant - I sometimes include any information I gleaned from the label, or why I purchased the fibre, or what shape the fibre is in.
Before you finish, write your Item Number somewhere on the ‘original’ fibre - For example, I write the item number on the inside of a cone, or on the label(s) of balls of yarn, or with a pencil on the corner of a fabric. That way, you will know what you’ve already logged, and where to find it in your log.
my fibres carefully labelled and dyed in olive
Two: Label Label Label
When you are about to start a dye project, and you’ve chosen and got your fibres ready to start (See Preparing your Fibres) it’s time to label everything. Well, everything fibre related!
To each skein of fibre that you have prepared, attach a label.
Create a little plastic label for each skein. Rummage through your plastic recycle bin for something - a yogurt container, or a broken binder cover, or some packaging - that you can cut up to make your labels.
Using an indelible ink pen (sharpie), write the Item Number on each label. Leave space to write later steps.
Using an unbreakable thread (30 g, 100% polyester), sew this label to your skein.
You will add information to this label for each step that your fibre goes through. So take the time to make it work for you.
Three: Develop a Shorthand (or a Log) for Your Processes
So you’ve labelled everything and you’re ready to start. What next?
Well that depends on your dye journey.
Perhaps you plan to pre-mordant. Maybe you will prepare your dye baths in different ways to see what difference it makes. Perhaps you decide to overdye or post-mordant to get a different colour. Or maybe you think the PH needed adjusting.
Whatever steps you take, your label is where you make a note of it, ideally in shorthand, as you go.
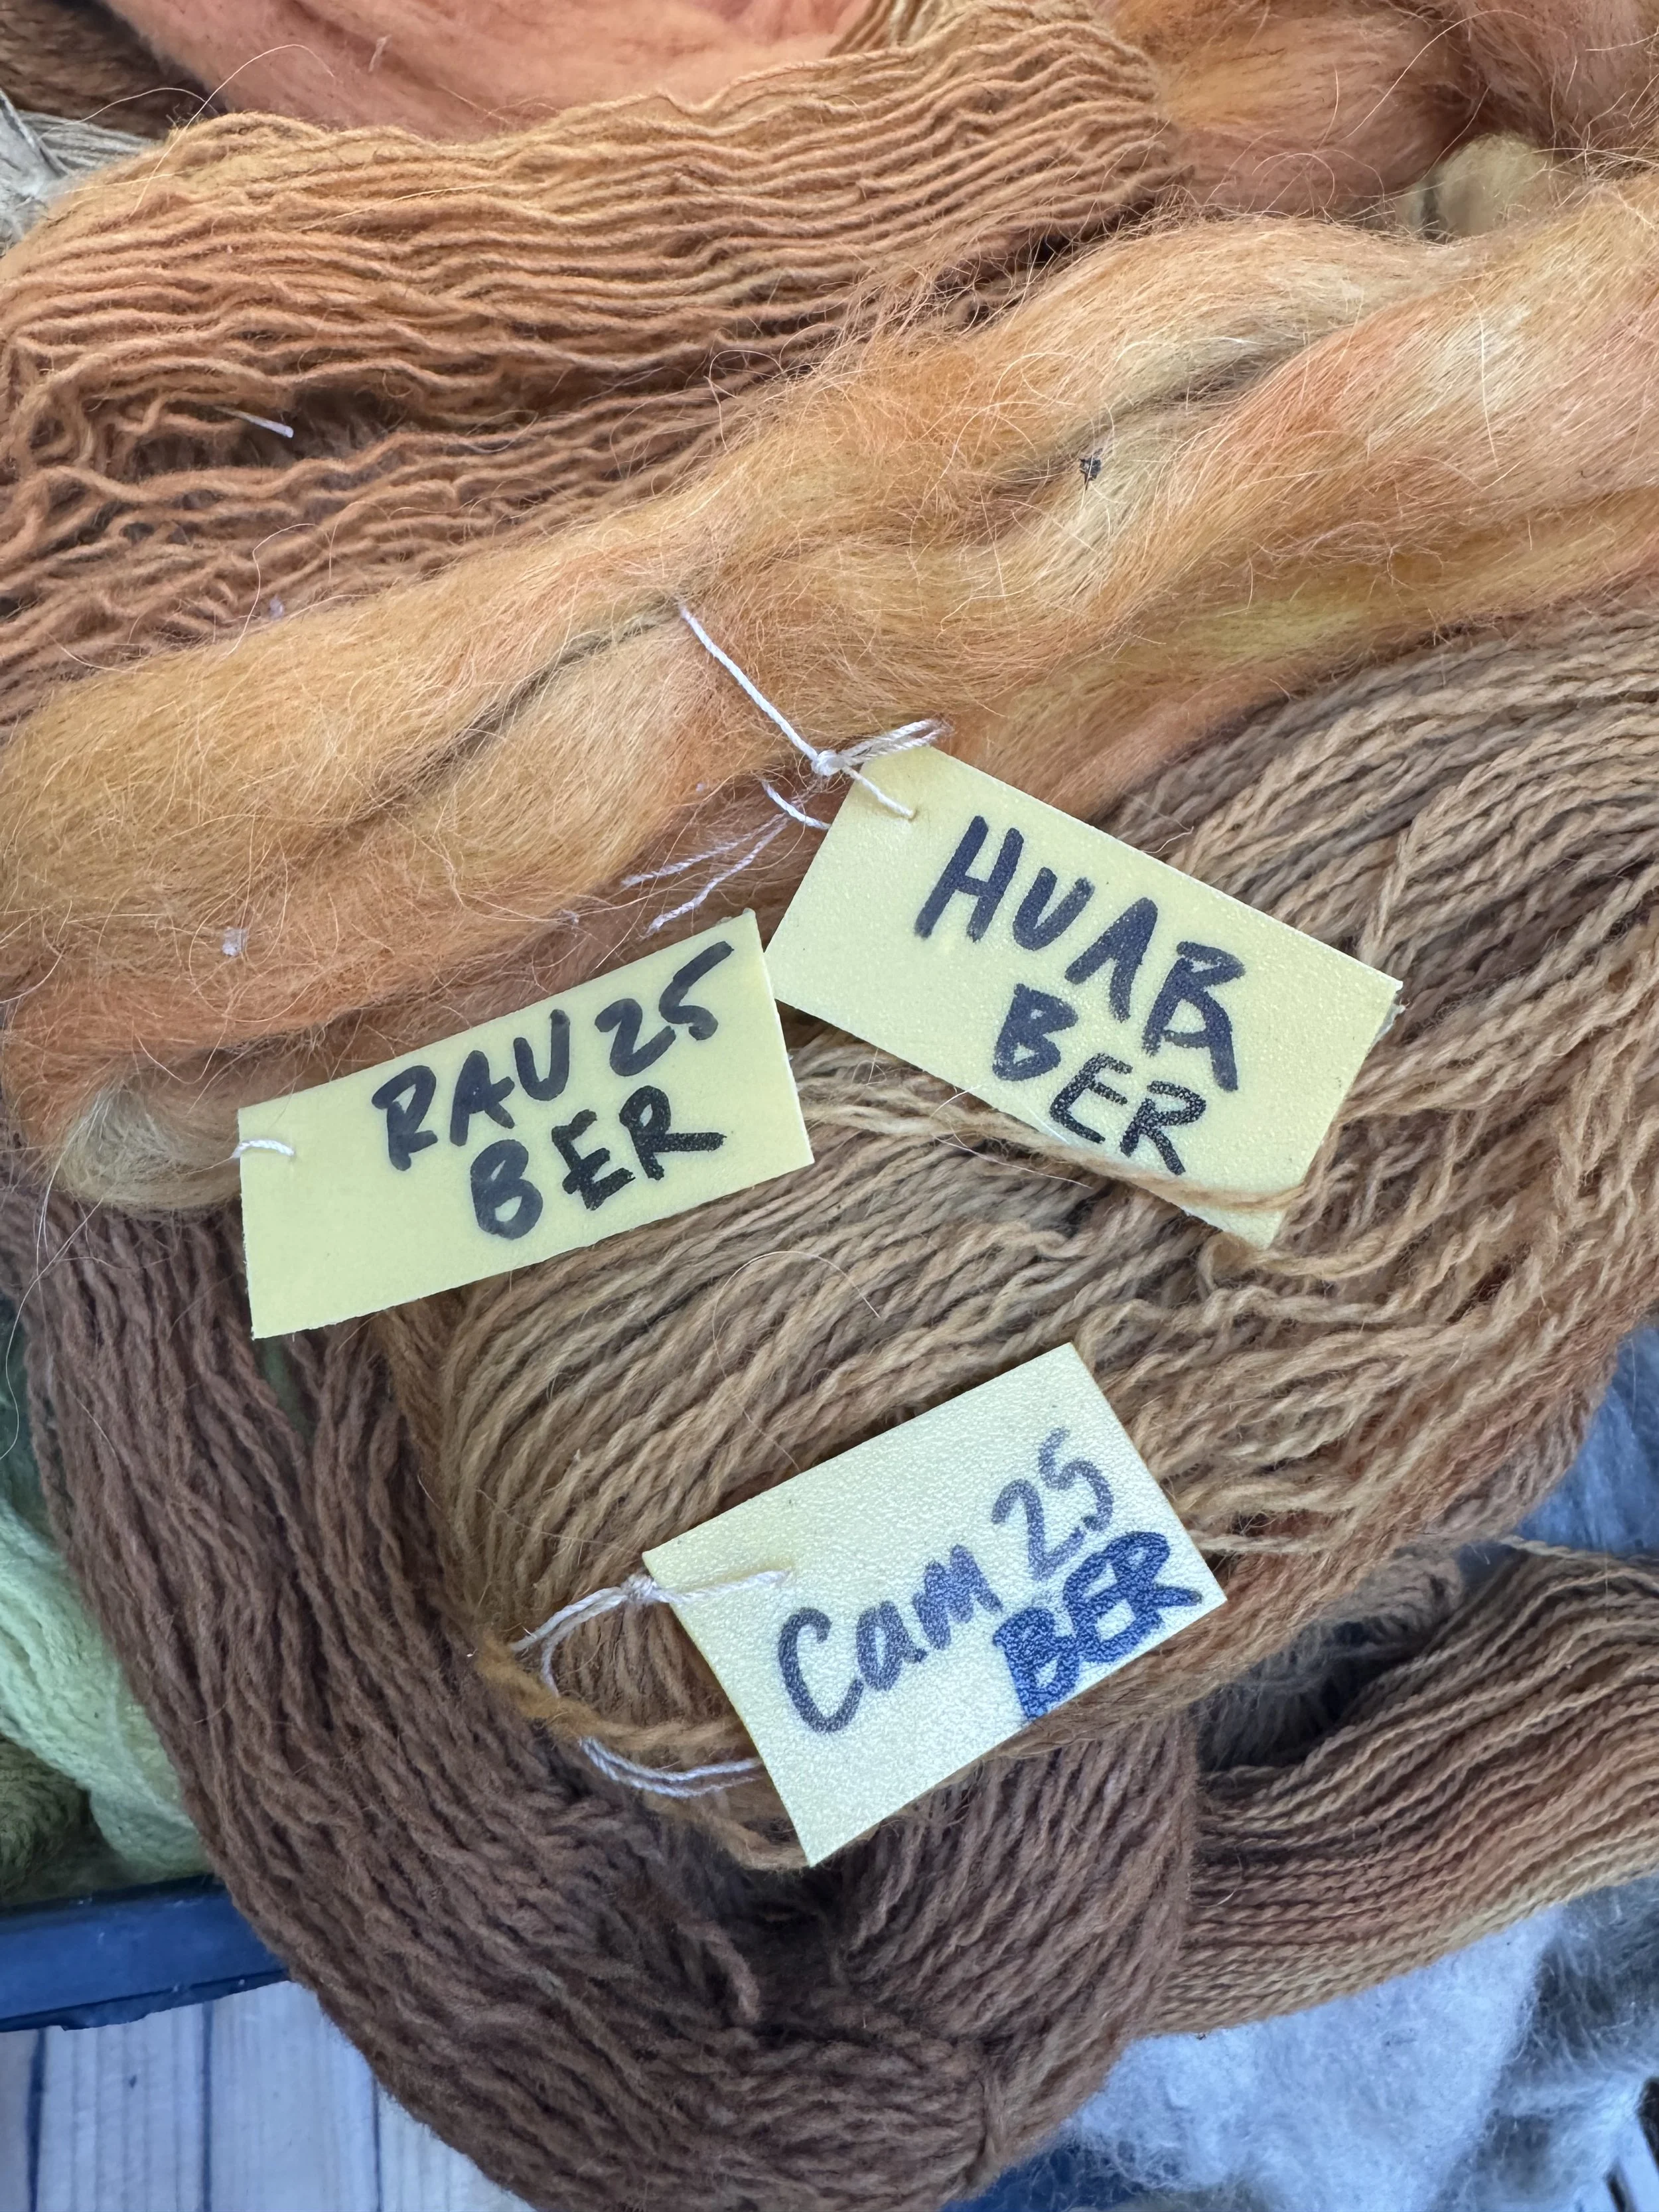
My labels are organized spatially. My item number goes at the top. I put the pre-mordant information in the bottom left and my dye bath in the bottom right. I use the back of the label to indicate anything I do once the skein comes out of the dyebath.
In the photo you can see my labels.
RAU25 is my Item Number, B is for my Basic mordant - 15% alum, ER stands for Eucalyptus Red. With this tiny tag, I can easily track and add information about each step in dye journey.
I have a process log that I use as I go, scribbling little notes to help me remember what happened.
enjoy The Journey!
There are days when I forget to label. Or I’m just to excited to bother. And that’s okay! All this logging and labelling is about being able to reproduce what you’ve done. And some days, you just want to play, so let yourself!